Complete Guide: AWS Account Creation, EC2 Instance Setup, and Connecting Methods Explained

Hi there! I'm Imran, a passionate software engineer, and DevOps enthusiast with 6 months of experience building and delivering innovative solutions. With expertise in React, Next.js, TypeScript, Linux, Docker, Kubernetes, Jenkins, Terraform, AWS, Grafana, and Ansible, I am constantly exploring new ways to leverage technology to drive business value and improve user experiences. Follow along with me as I share my knowledge, insights, and experiences in the world of tech, and join me on a journey of continuous learning and growth.
Introduction
In this blog post, we will discuss the basics of Amazon Web Services (AWS) and why creating an AWS account is important. We will also walk through the steps of creating an AWS account, creating our first EC2 instance, and connecting to it using various methods.
What is AWS?
AWS is a cloud computing platform that provides a wide range of services to help individuals and businesses build and run applications in the cloud. It offers a highly scalable, reliable, and cost-effective infrastructure that enables users to deploy and manage their applications with ease.
Why create an AWS account?
Creating an AWS account is necessary if you want to use AWS services. Once you create an account, you can access a wide range of services, such as EC2, S3, RDS, and many more. AWS also offers a free tier that allows users to use some services for free for a limited time.
How to Create an AWS Account & Prerequisite?
Creating an AWS account is the first step towards leveraging the power of Amazon Web Services (AWS) and unlocking a wide range of cloud computing capabilities. In this guide, we will walk you through the process of creating an AWS account, ensuring you have everything you need to get started on your cloud journey.
Understanding the Prerequisites
Before diving into the account creation process, let’s explore the prerequisites you need to have in place:
Email Address: Ensure you have a valid email address as it will be associated with your AWS account.
Payment Method: Have a payment method available, such as a credit/debit card, as you may need it to pay for AWS services beyond the free tier limits.
Step-by-Step Account Creation
Now, let’s go through the step-by-step process of creating your AWS account:
Step 1: Accessing the AWS Homepage: Visit the AWS homepage (https://aws.amazon.com/) to initiate the account creation process.
Step 2: Clicking “Create an AWS Account”: Look for the “Create an AWS Account” button on the homepage and click on it to begin.

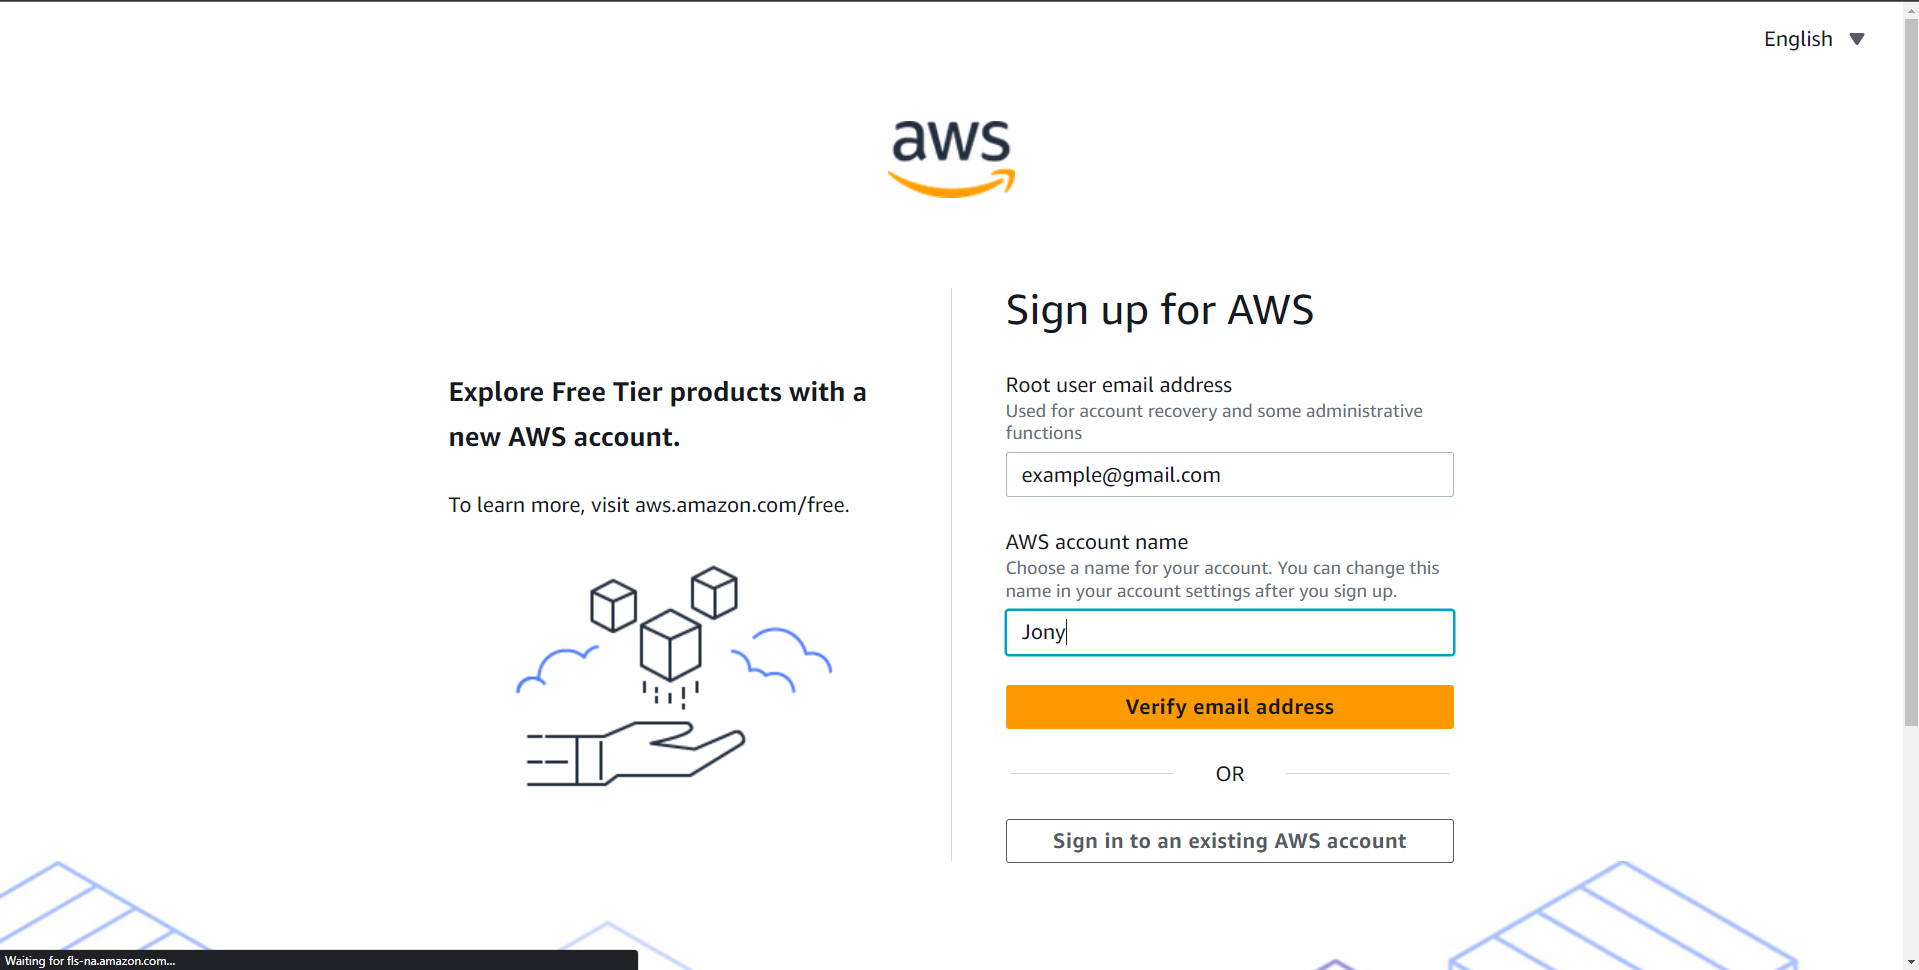
Step 3: Providing Root email address & AWS account name: Enter your valid/active email address, and a unique account name then clicks on “Verify email address”. As soon as you click this you’ll get a verification code in your email. Check that code and verify with that code.
Step 4: Create Your Password: Enter the root user password here and confirm the root user password. Make sure to choose a strong password for enhanced security. Then click on “Continue”.

Step 5: Contact Information: They will require you how do you use AWS. You can select “Personal” or “Business” according to your needs. Then click “Continue”.

Step 6: Billing Information: Take the time to fill in this information. Enter your Credit or Debit card number here. and its expiration date and cardholder name. Then select your Billing address and click “Verify and Continue”.

Once your account is created, you can access the AWS Management Console, where you can manage your services and resources.
Creating your first EC2 instance
Now that you have an AWS account, you can create your first EC2 instance. Follow these steps:
Log in to the AWS Management Console.
Navigate to the EC2 Dashboard and click on the “Launch Instance” button.

3. Choose an Amazon Machine Image (Ubuntu) from the list provided.
4. Choose an instance type, which determines the hardware resources available for your instance.
5. Configure instance details, such as the number of instances, network settings, and storage options.
6. Review your instance details and click on “Launch” to create your instance.
Once your instance is launched/created, then you will able to see this (Your First EC2 Instance).

Connecting to your EC2 instance
There are several methods available to connect to your EC2 instance in Amazon Web Services (AWS). Let’s explore the different methods in detail:
SSH (Secure Shell) using Terminal: This method is commonly used for Unix-based systems (Linux, macOS, etc.) and requires an SSH client.
Open the Terminal application.
Use the SSH command along with the private key and username to connect to your EC2 instance. Example:
ssh -i <private-key-file>.pem <username>@<public-ip-or-dns>
AWS Systems Manager Session Manager: AWS Systems Manager provides a feature called Session Manager, which allows you to establish secure connections to your EC2 instances through the AWS Management Console or AWS CLI.
Open the AWS Management Console.
Go to the EC2 service and navigate to the “Instances” section.
Select the desired instance and choose the “Connect” button.
Choose the “Session Manager” option to establish a connection.
AWS Instance Connect: AWS Instance Connect is a browser-based SSH connection method available in the AWS Management Console.
Open the AWS Management Console.
Go to the EC2 service and navigate to the “Instances” section.
Select the desired instance and choose the “Connect” button.
Choose the “Connect using EC2 Instance Connect” option to establish the connection.
PuTTY (Windows): If you are using a Windows operating system, you can utilize the PuTTY suite, which includes PuTTY (SSH client) and PuTTYgen (key generator).
Download and install PuTTY and PuTTYgen from the official website.
Convert your private key file (.pem) to a PuTTY-compatible format using PuTTYgen.
Open PuTTY and enter the instance’s public IP or DNS name.
Configure the SSH connection settings, including the private key file.
Click “Open” to initiate the connection.
File Transfer Protocol (FTP) and Secure Copy (SCP): FTP and SCP protocols can be used to transfer files between your local machine and the EC2 instance.
Use an FTP client (such as FileZilla) or an SCP client (such as WinSCP) to establish the connection.
Enter the instance’s public IP or DNS name, username, and private key file for authentication.
Transfer files to and from the EC2 instance as needed.
Conclusion
By following this comprehensive guide, you can easily create your AWS account and gain access to the vast array of cloud services offered by AWS. Ensure you have met the prerequisites, and follow each step carefully to successfully create your account. Start harnessing the power of AWS and embark on your cloud computing journey today!


